

Cro-Quilting
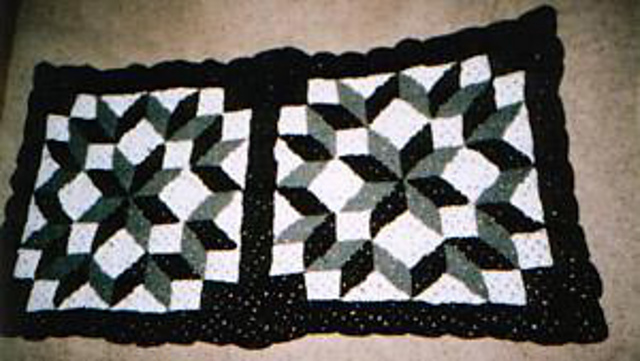
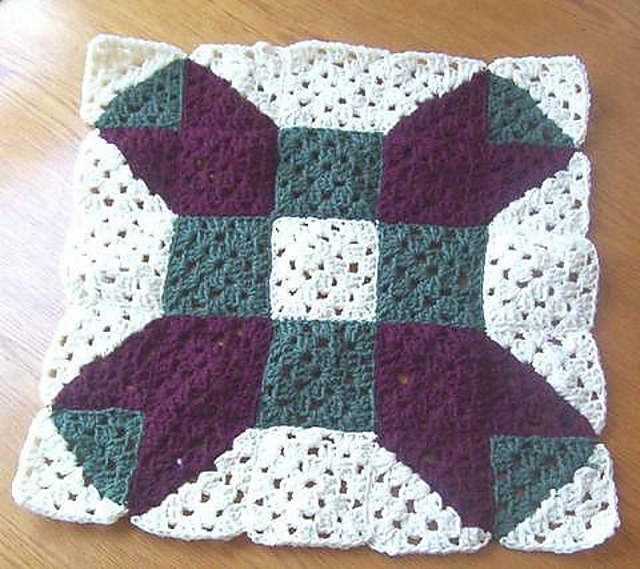
Quite a few people have asked me about the quilted afghans that I design. While they are a lot of fun to do, remember that each square is made of smaller squares, each with ends to weave in. One afghan I finished had almost 1000 ends to weave in. This is not for the faint of heart! That being said, they are lovely when finished. You can see the finished products.
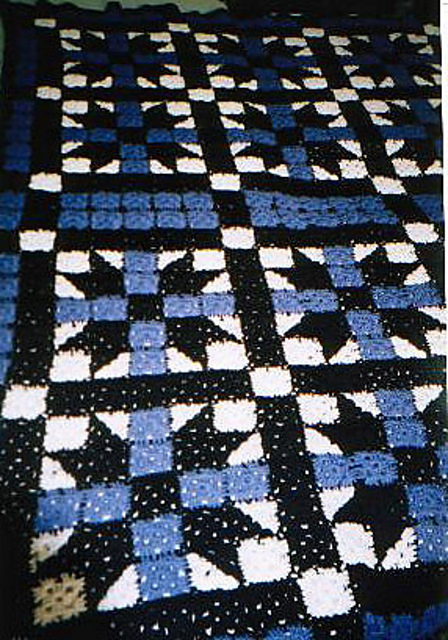
Any quilt pattern that can be divided into squares can be used as a reference. You can see in this chart, how I break up a quilt pattern so that I can use it as a source (although this is my original pattern).
There are many sites with quilting info out there, but this site is one of my favourites for inspiration. Here’s how I create my squares:
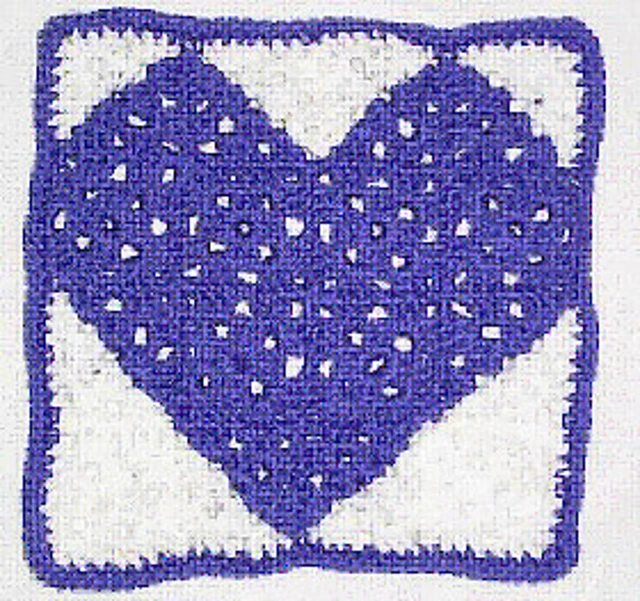
Purple Heart Square (c) 2003 Sherri Bondy
This design works up to a 12″ square in worsted weight. I’ve explained the process as much as possible…it sounds confusing, but it’s really not hard…just be prepared to weave in ends. Gauge: Each square measure 3″ across when complete. Make 6 solid squares, 2 white squares and 8 ½ and ½ squares. Materials: for each individual square, a small amount of worsted weight yarn is used, but if you are doing this design for a complete afghan (queen size), you can expect to use close to 3000 yards can be required (depending on finished size and design). Use size 4.5 hook or hook required for gauge. Each square is just a smidge under 3”, but the solid colour squares will be closer to 3″. You can fix it by stretching the 1/2 squares when you sew it together.
Two-toned square pattern:
Round 1: With colour A, make a slip knot. Ch 5, sl st to first ch and form loop. Ch 5 (this will be the first dc and ch2), then 3 dc in loop. Ch 1. Join second colour by pulling it through the loop of the first colour (which is still on the hook). Leave a 4″ tail to weave in on next row. Snug the yarn up to the hook, but don’t tie a knot! Cut first colour, leaving a 4″ tail. To work in tail, hold the ends of second colour yarn of together. Ch 1, then 3 dc, ch 2, 3 dc and ch 1 in loop. Change back to original colour, (remember to leave tail to weave in on next row), tighten up, ch 1, 2 dc in loop, slip into 3rd ch of ch 5. The first row is now complete and should look like the beginning of a traditional granny square. Do not cut second colour – you will use it to begin next row.
Round 2 – With the second colour, sc into ch 2 space of previous row, ch 2, 2 dc, ch 2, 3 dc in same space. Ch 1 and take the hanging tail and hold it next to same colour yarn as you do 3 dc, ch 1, cut second colour and switch colours (leave that tail), ch 1 with new colour, 3 dc, ch 1. In the next corner 3 dc, ch 2, 3 dc. Ch 1, 3 dc in next corner, switch to original colour then chain 1, 3 dc, slip to join. Cut all ends still attached to balls of yarn and weave in ends.
Solid colour square: Ch 5, join with sl st to first ch to form ring. Round 1: Ch3, 2 dc in loop. Ch 2, *3dc in round, ch3. Repeat from * 2 times more. Ch2, sl st in top of ch3. Round 2: Sl st in the first 2 dc’s and in the first ch 2 lp. Ch3, 2 dc in ch 2 sp, ch2, work 3 dc in same sp. *Ch1, work 3 dc, ch2, 3 dc in next ch 2 lp.* Repeat between *’s three times. Ch1, join with sl st to top of ch 3. Weave all ends in securely without tying knots.
With right sides together, whip stitch squares according to chart (see beginning of this post) Complete by doing 2 rounds of sc around entire square in solid colour.

